Sourdough baking is a rewarding process, but it can sometimes feel like an unpredictable adventure. From flat loaves to overly sour flavors, every baker encounters challenges along the way. The good news? Most sourdough problems have simple solutions.
In this guide, we’ll address common sourdough issues, explain their causes, and provide practical fixes to help you perfect your loaves.
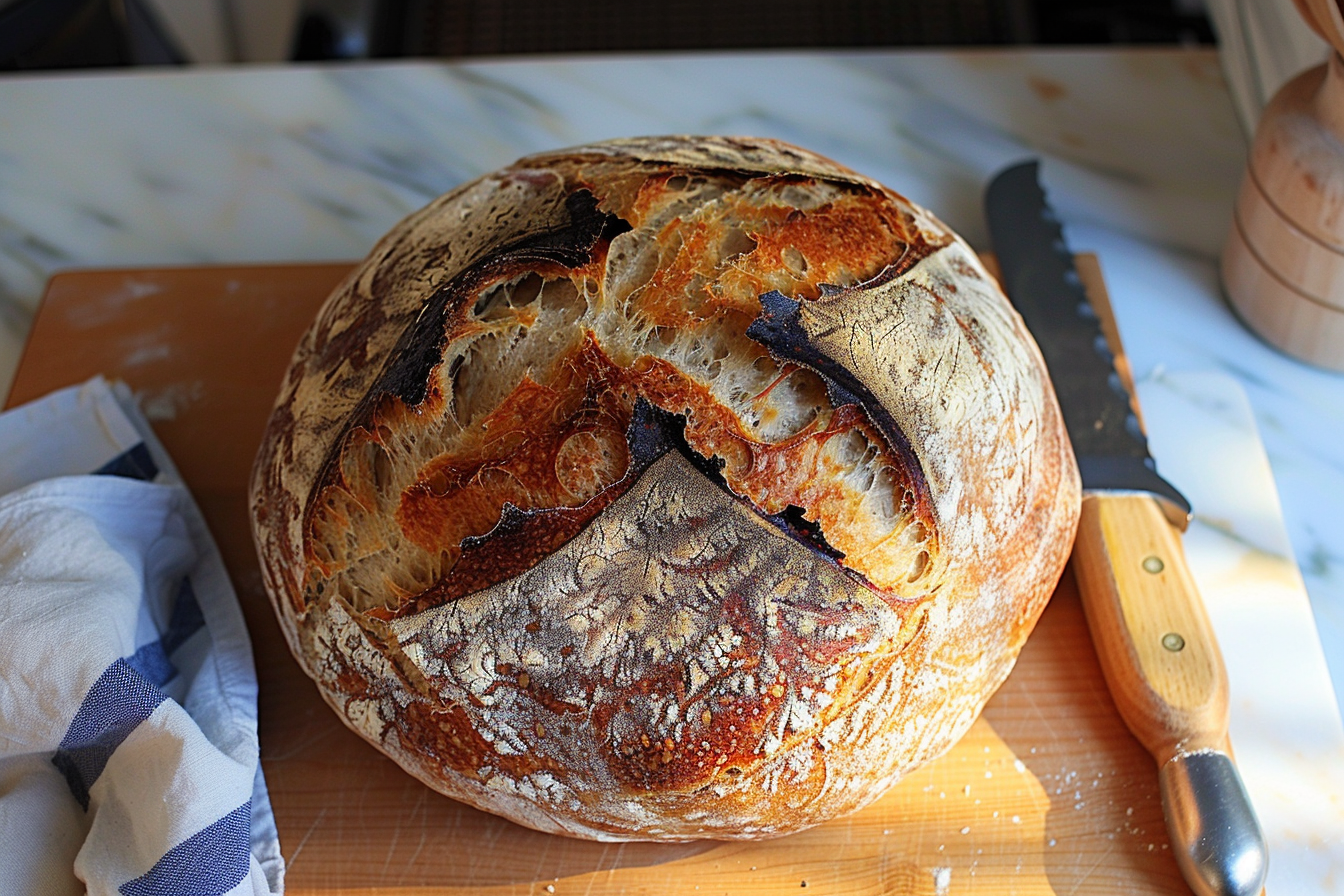
1. Common Problems and Solutions
- Flat or Dense Loaf
- Cause: Underproofing, weak starter, or poor gluten development.
- Solution:
- Ensure your starter is active and bubbly before using it.
- Allow the dough to rise fully during bulk fermentation. Use the poke test—if the dough springs back slowly, it’s ready to bake.
- Knead or fold the dough sufficiently to develop gluten.
- Overly Sour Flavor
- Cause: Overfermentation or high acetic acid production.
- Solution:
- Reduce fermentation time or ferment at a slightly warmer temperature (75–80°F / 24–27°C).
- Use less starter to slow down fermentation.
- Sticky or Wet Dough
- Cause: Overhydration, underdeveloped gluten, or improper handling.
- Solution:
- Reduce the hydration level slightly in your recipe.
- Incorporate stretch-and-fold techniques during bulk fermentation to strengthen the dough.
- Use lightly floured hands and surfaces when handling sticky dough.
- Collapsed Dough
- Cause: Overproofing or weak gluten structure.
- Solution:
- Shorten proofing time—check the dough regularly to avoid overproofing.
- Ensure proper gluten development during mixing and folding stages.
- Pale Crust
- Cause: Low oven temperature or insufficient baking time.
- Solution:
- Preheat the oven thoroughly to at least 450°F (230°C).
- Bake longer or use a baking stone/steel for better heat distribution.
- Thick, Hard Crust
- Cause: Low hydration or insufficient steam during baking.
- Solution:
- Increase dough hydration slightly.
- Add steam to the oven by baking in a Dutch oven or placing a pan of water or ice cubes on the oven floor.
- Uneven Crumb
- Cause: Inconsistent shaping or fermentation.
- Solution:
- Shape the dough with proper tension to create an even structure.
- Allow sufficient bulk fermentation for better gas distribution.
- No Rise During Baking (Poor Oven Spring)
- Cause: Overproofing or improper scoring.
- Solution:
- Score the dough deeply to allow controlled expansion.
- Avoid overproofing—bake when the dough has risen about 50–70% in the final proof.
- Bland Flavor
- Cause: Short fermentation time or lack of whole-grain flour.
- Solution:
- Extend fermentation time for more complex flavors.
- Incorporate whole-grain flours like rye or whole wheat into your recipe.
- Mold on Starter
- Cause: Contamination or long periods without feeding.
- Solution:
- Discard the moldy starter and start fresh.
- Feed your starter regularly and keep it in a clean container.
2. Tools for Troubleshooting
Having the right tools can help you identify and fix problems more effectively:
- Digital Thermometer: To monitor dough and oven temperature.
- Kitchen Scale: For precise measurements.
- Proofing Box: To maintain consistent proofing temperatures.
- Bread Lame: For clean, controlled scoring.
3. How to Identify Proofing Problems
- Underproofed Dough:
- Dense crumb, poor rise, tight texture.
- Solution: Extend bulk fermentation or proofing time.
- Overproofed Dough:
- Collapsed loaf, sour flavor, lack of oven spring.
- Solution: Reduce proofing time and bake as soon as the dough is ready.
The Poke Test:
- Press a finger gently into the dough.
- If it springs back slowly but leaves a slight dent, it’s ready to bake.
- If it springs back quickly, it needs more proofing.
- If it doesn’t spring back, it’s overproofed.
4. Starter Troubleshooting
- Inactive Starter:
- Cause: Infrequent feedings or insufficient nutrients.
- Solution: Feed with whole-grain flour (rye or whole wheat) and warm water.
- Hooch (Liquid Layer on Top):
- Cause: Starter is hungry.
- Solution: Stir the hooch back in or pour it off, then feed the starter.
- Smelly Starter:
- Cause: Starter imbalance.
- Solution: Discard most of the starter and refresh with fresh flour and water.
5. Preventing Common Mistakes
- Plan Ahead
- Sourdough requires time and patience. Read through the recipe and prepare for each step.
- Understand Your Environment
- Adjust fermentation times based on temperature and humidity.
- Keep a Baking Journal
- Note down your ingredient ratios, fermentation times, and results to track progress and identify improvements.
6. FAQs About Troubleshooting Sourdough
- Why Is My Loaf Too Dense?
- Likely underproofed or not enough gluten development. Strengthen the dough with folds and extend proofing time.
- Why Does My Bread Taste Bland?
- Short fermentation time or insufficient whole grains. Extend bulk fermentation and try using rye or whole wheat flour.
- Can I Fix Overproofed Dough?
- Yes! Gently reshape the dough, let it proof briefly, and bake immediately.
- How Do I Know My Starter Is Ready to Use?
- It’s ready when it doubles in size within 4–6 hours of feeding and passes the float test (a dollop floats in water).
Troubleshooting sourdough can feel daunting, but every mistake is an opportunity to learn. By understanding common problems and their causes, you can refine your process and consistently bake better bread. Remember, sourdough is a living, dynamic process that rewards patience and persistence.
Keep experimenting, embrace the journey, and enjoy the delicious results. Happy baking!
